

|
#1
 04-06-2010, 10:43 AM
|
||||
|
||||
|
I just put some photographs of a butterfly name banner that I made in the gallery and I wanted to share how I made parts of it.
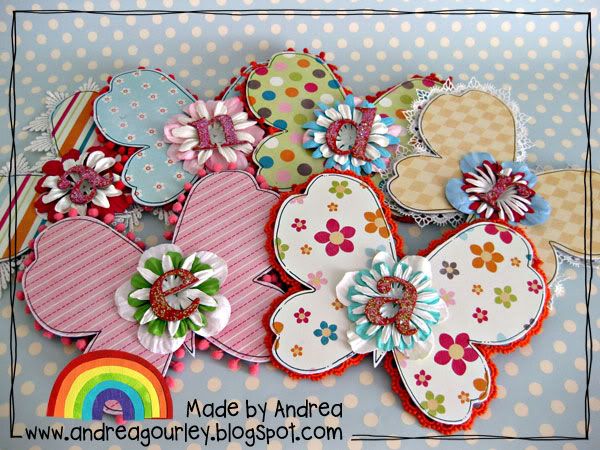 This started life as a Maya Road butterfly chipboard mini book (some of you may have one because Robin used to sell them here in the store)  I used 6 of the 'pages' to make my banner and covered them with Melissa's Bee Happy papers (totally gorgeous papers by the way, I could easily wallpaper my house them  ). You only need to cover one side ). You only need to cover one sideWhen you have them covered turn over and use a hot glue gun to attach braid, lace or pompom trim around the edge. Go slowly and do small sections. Watch your fingers because that glue can get HOT! Apply small lengths of the glue and then press the trim into it getting it as close to the edge as you can. 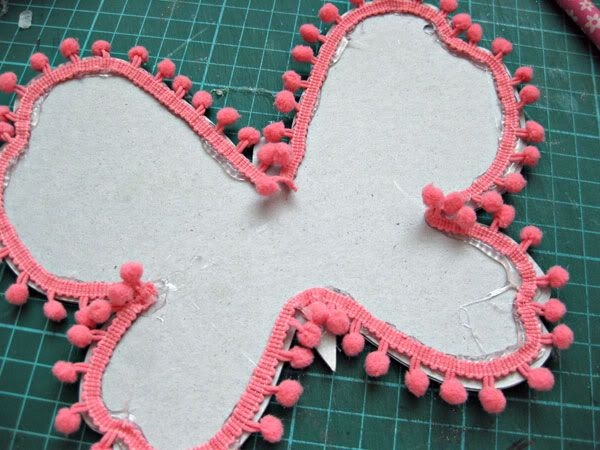 It doesn't matter how messy and untidy it is as no one is going to see the back. I used lace on some of my butterflies and I can tell you the back of those ones are really untidy  The hot glue will dry really quickly so you can flip the butterfly over and decorate the front. I coloured my chipboard letters with a Promarker first as it is quick but any felt pen or paint would work. 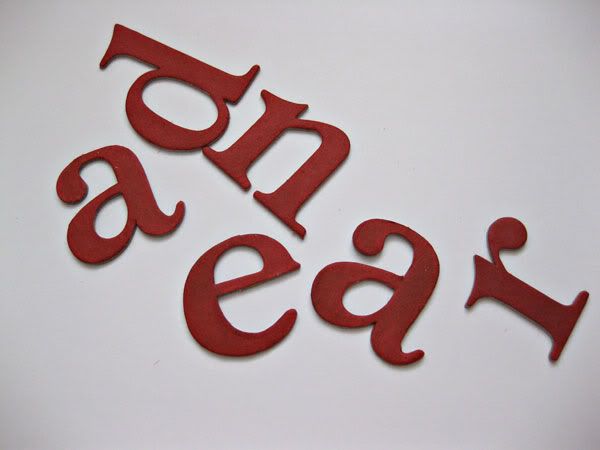 Then I covered each letter with glue and added some chunky glitter from Doodlebug - my new passion Choose paper flowers that come in different sizes so that they can be stacked and glued onto the butterfly and then glue the chipboard letter on the top. 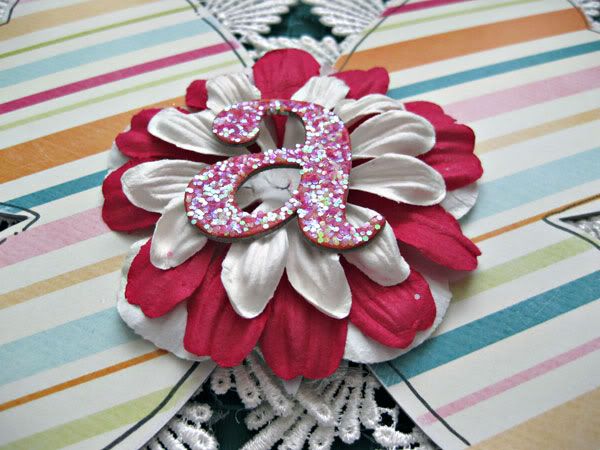 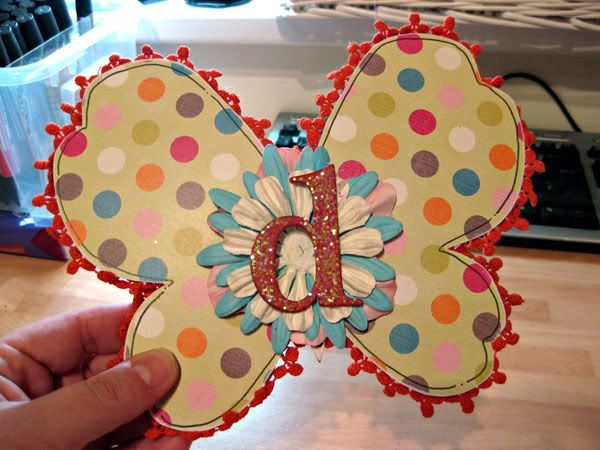 Then either punch holes and string the butterflies or use little clips to attach them onto a string Here is a very dodgy photograph of my banner in place. 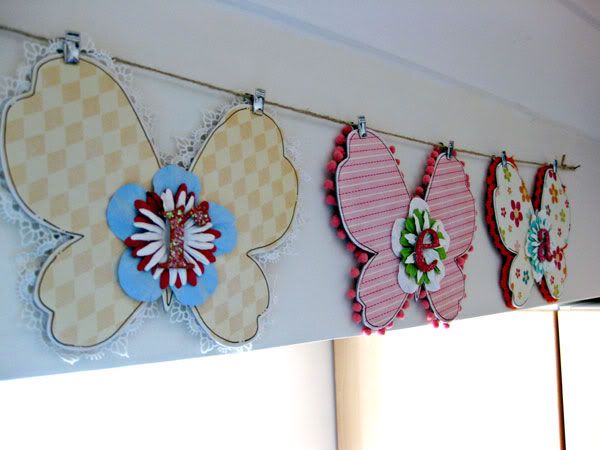 This was really an easy project to make and would look gorgeous in a girly room or change the papers and the shape of the chipboard mini book that you use as the base and turn it into a boy themed banner
__________________
   
|


|
#3
04-06-2010, 11:25 AM
|
||||
|
||||
|
Awwww, that's SO cute!!! Great project Andrea!!!
__________________
~Colleen~
Re-attempting a creative life after far too long!
|


|
#4
04-06-2010, 11:42 AM
|
||||
|
||||
|
aw those are adorable!
__________________
~~La~~
|

|
#5
04-06-2010, 11:54 AM
|
|||
|
|||
|
I love this!
And wallpapering your house isn't too bad. When I was picking out paint for my room (still haven't painted, btw), I chose paint based on what layouts I wanted to hang on the walls :P
__________________
New Siggy Coming Soon
|


|
#7
04-06-2010, 05:50 PM
|
|||
|
|||
|
So simply adorable!
|


|
#11
04-17-2010, 04:10 PM
|
||||
|
||||
|
omg! That is freaking gorgeous! It would be perfect for above my dds beds in their room! I may have to see if i can find the butterflies, although I know I've seen other chipboard shapes around.
|

 |
«
Previous Thread
|
Next Thread
»
 Linear Mode

|
|

All times are GMT -4. The time now is 07:04 AM.