

|
#1
 09-21-2013, 06:16 PM
|
||||
|
||||
|
It looks like 2 papers are on top of each other. The bottom paper "peeks" through the top paper in random places. Like if you took a sponge and gently erased the top paper. It's a perfect blend so so you can't tell where the top paper was exactly erased. I've seen this in many layouts and would love to learn this technique. Any tips are appreciated.
__________________
 
|


|
#4
09-21-2013, 06:28 PM
|
||||
|
||||
|
I would also check out Lex's tutorial on Blending Background Papers.
__________________

|

|
#5
09-21-2013, 06:30 PM
|
||||
|
||||
|
Hopefully someone who's better at it will chime in, but I know one of the ways to do it is to use a purchased overlay and clip a paper to it. Sometimes people also play with the blending modes to get the look they want. I did a quick search in the shop and found these.
   ETA: I clearly posted way too slowly; when I started there were no responses yet!
__________________

|

|
#6
09-21-2013, 06:45 PM
|
||||
|
||||
|
Quote:
[ 
__________________
|

|
#7
09-21-2013, 09:03 PM
|
||||
|
||||
|
If you want to do smaller areas like that, you can use a paint stroke or splotch (whatever that word should be!) or a photo mask. Choose one that's more opaque in the middle and less opaque near the edges. Then just clip the paper you want to use to it and merge the layers. After that adjust the opacity if the area isn't blending in as well as you'd like.
__________________
|
|
#8
09-21-2013, 09:54 PM
|
||||
|
||||
|
Another method to sort of "erase" parts of the top paper to get the bottom to peek through is to try the method outlined in the Daily Digi's "Fonts Don't Float" post
 It's one of my favorite techniques to play around with in art journal pages. I use it on fonts, brushes, masks, and yup, background papers as well!
|

|
#9
09-21-2013, 10:43 PM
|
||||
|
||||
|
Quote:
__________________
|


|
#10
09-22-2013, 02:11 AM
|
||||
|
||||
|
Quote:
__________________
|
|
#11
09-22-2013, 05:07 AM
|
||||
|
||||
|
Yeah, that looks like a paper clipped to a photomask or brush rather than anything peeking through. The paper underneath is solid, not floral. But if you wanted to see the paper underneath, the technique is similar. You can apply a layer mask of whatever shape to the top paper. In either case, you'd use a mask, so that's the term you want to search for. I'm sure there are tons of tutorials for both clipping masks and layer masks in whatever program you use.
__________________

|

|
#12
09-22-2013, 05:40 AM
|
||||
|
||||
|
I think Heather's tutorial hasn't been mentioned yet, it totally helped me to see the light:
https://www.sweetshoppedesigns.com/t...ng-with-paper/ A picture to illustrate what it does (look at the lower right corner): 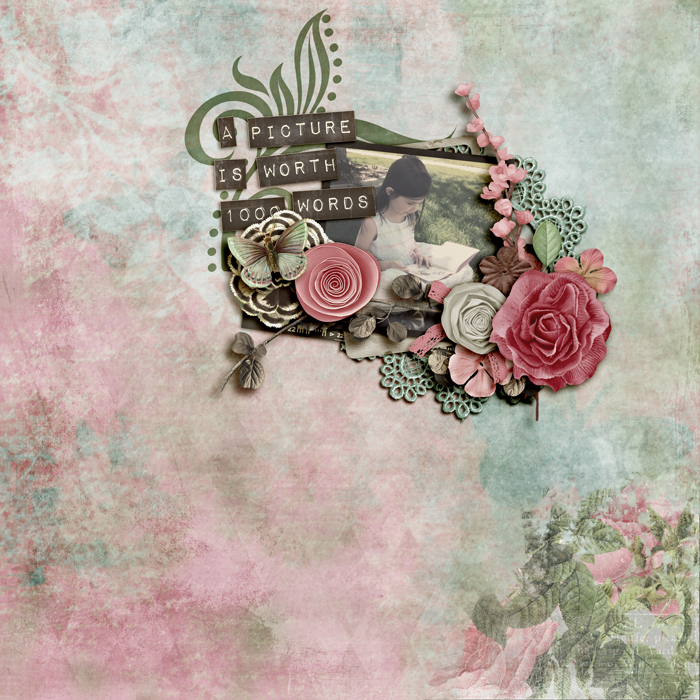
__________________

|

|
#13
09-22-2013, 06:54 AM
|
||||
|
||||
|
You know what, that's my layout and I can't remember how I did it but it must have been a clipping mask because I have no idea how to do the other things mentioned

|

|
#14
09-22-2013, 11:31 AM
|
||||
|
||||
|
Quote:
__________________
|
|
#15
09-22-2013, 03:22 PM
|
||||
|
||||
|
Quote:
__________________
|
|
#16
09-22-2013, 03:24 PM
|
||||
|
||||
|
Quote:
__________________
|
|
#17
09-23-2013, 10:27 AM
|
|||
|
|||
|
Quote:

|
|
#18
09-25-2013, 05:12 AM
|
||||
|
||||
|
You can use Heather's technique or what I do is put the paper I want only part of on top of the background layer and pick a brush with soft edge but use it in the eraser function and erase away where I don't want the blend paper layer. Or you can pick any brush tip for that matter you want and use it in eraser mode.
__________________

|

 |
«
Previous Thread
|
Next Thread
»
 Linear Mode

|
|

All times are GMT -4. The time now is 04:50 AM.