

|
#1
 09-15-2010, 02:36 PM
|
||||
|
||||
|
I had posted pics of these on another thread and then had requests for the instructions.... had a baby a few days later and am just getting to post them now!! Let me know if you need any clarifications on any steps: (pics of the completed project at the end of this post)
Desk Caddy Class Instructions SUPPLY LIST: Supply List: *** 6 - 4x4 thick chipboard pieces OR 4x4 Coasters. (If you don't have thick enough chipboard (You want this to be sturdy) you can always glue 2 chipbboard pieces together. *** For Chipboard Gluing I like to use 3 in 1 glue. Or my ATG Gun. Both work great. *** You'll need 4x4 patterned paper squares. Since we will be covering both sides of the chipboard you'll need 12 pieces of 4x4 patterned paper. *** Inks - I use Tim Holtz Distress Inks *** 1 4x4 piece of acetate, acrylic, etc... YOU can use the packaging material that comes off of clamshell packages or any type of sturdy see thru material *** 3x3 Post It Notes (1 set) *** A cropodile or other way to make holes. I use my BIG cropodile for this one *** 2-3 yards of ribbon that coordinates with your patterned paper *** A few pieces of cardstock that matches the patterned paper *** 2 Black Binder Clips (see photo) *** A border punch or deco scissors *** From your stash grab a few stickers or quote stamps. We'll use one on the desk caddy and you can choose from what you have in your stash! *** Craft Knife and mat *** Hot Glue Gun if you have one. --- Step 1: Cut Chipboard into 4x4 pieces. Since you want this to be sturdy you will need 12 for this project. Then using a good sturdy glue (I used 3 in 1 glue) - you will want to glue 2 pieces of chipboard together. You will end up with 6 4x4 thicker squares. Cut patterned paper into 4x4 squares. You will need 12. Then adhered them to both sides of the chipboard squares. Using ink distress the squares! 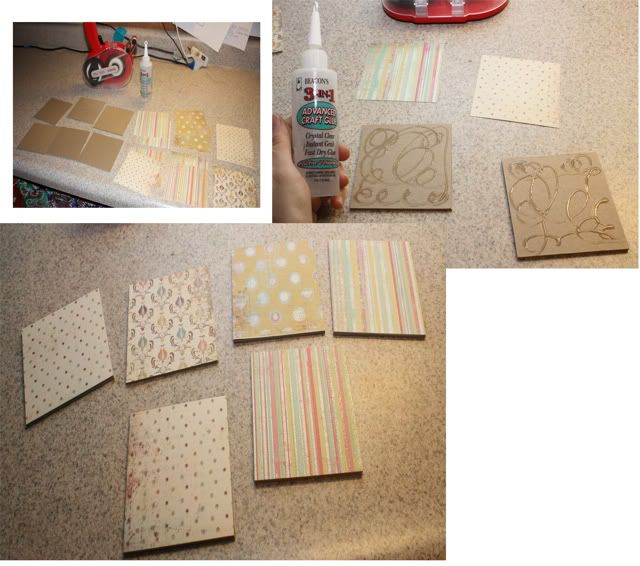 --- Step 2: Cut a 4x4 piece of clear acetate, acrylic, or other clear plastic material. --- Step 3: Lay FOUR of the squares in a row. (the other 2 will become the divider and the bottom) Then decide which square to put the clear piece on. Taking a scrap piece of paper punch four holes on each side (see picture) for a pattern. Then lay this on top of a chipboard square and using the BIG BITE Cropodile or other hole punching method punch the holes out on all 4. Punch holes in your clear piece as well. 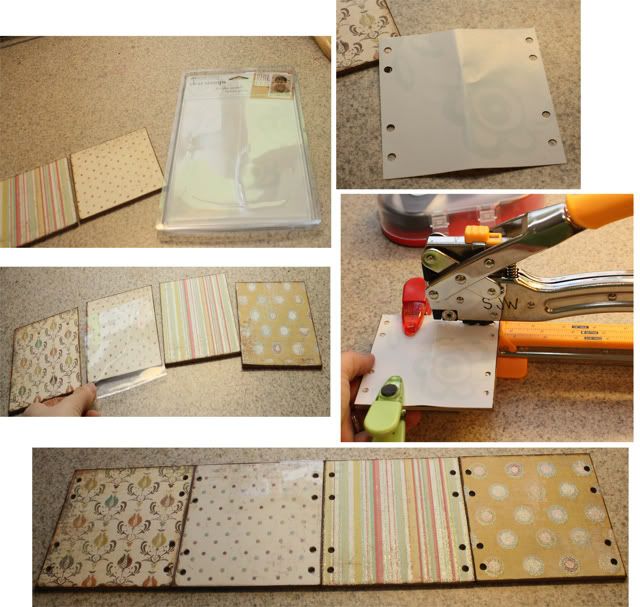 --- Step 4: Now we are going to decorate a few of the squares before putting it together. The first square is going to be your POST-IT NOTE center. You’ll want a 2x3 piece of cardstock. I then used a border punch on one end of it. Glue one end to the back of the post it note pack and then fold it over creasing it along the back and front. (see pictures) 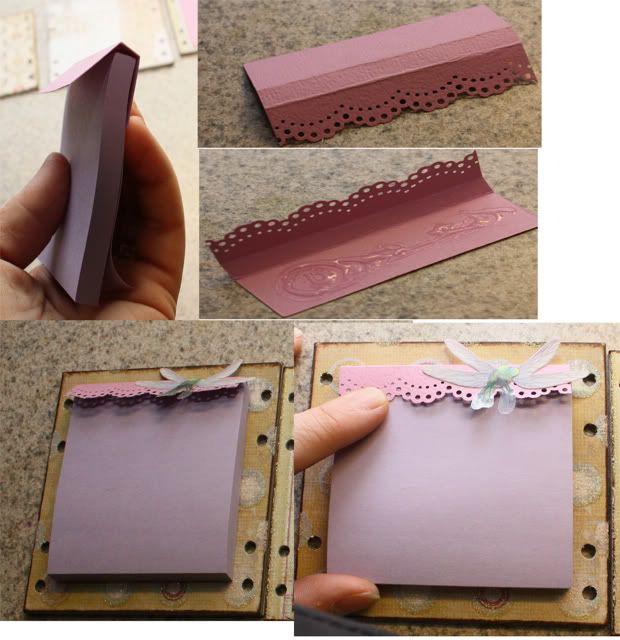 --- Step 5: The next square will be a place to hang photos. SO you will just need to cut a piece of cardstock 3 x 3 1/4. Then adhere it to the square in between the punched holes. --- Step 6: Now we assemble. Lace ribbon through the holes to TIE it all together. (see photos) For now ONLY tie 3 together. 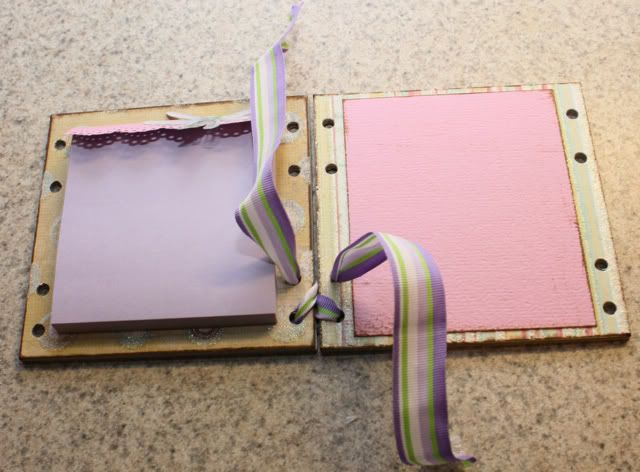  --- Step 7: Take the square that is the bottom of your caddy. Then flip over the strip of 4 squares so you are gluing on the inside or "back". Using a hot glue gun (or other STRONG glue) place a strip of glue on the bottom of the third square. (see photos for attatching the bottom) --- Step 8: Once your box is all together you can LACE the last 2 squares together. Pictures for Steps 7 and 8: 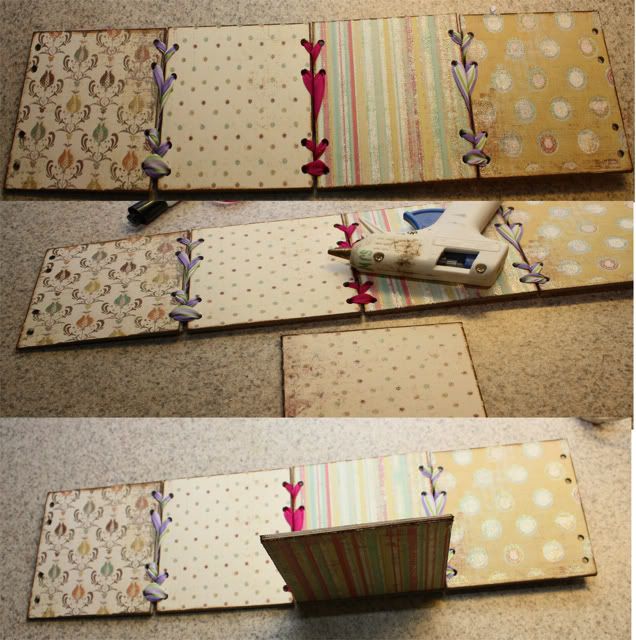 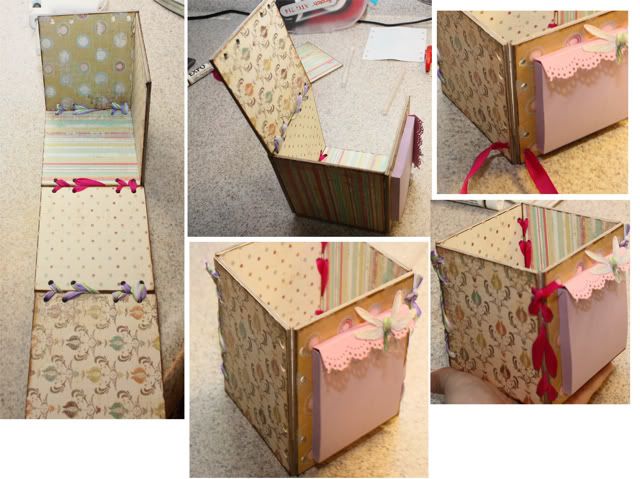 --- Step 9: Now for the divider. Using a craft knife or heavy duty paper cutter cut your 4x4 square in half. So you have 2- 2x4 pieces. Then using your craft knife cut a long slot in one and a shorter slot in the other. Make sure your slot is only as wide as the chipboard piece. Any wider and it flips and flops all over the place! LOL! --- Step 10: Place the divider in the box. NOW to keep it in place slide each edge over a bit, place a drop of hot glue where it was and then slide it back over into the glue. In this photo below you can see the DROP of hot glue. I then just slid the edge back over into the glue. Do this to each of the 4 edges. To hide the middle of the divider since it looked a bit undone to me I tied a ribbon in a knot around it. Pictures for steps 9 and 10:  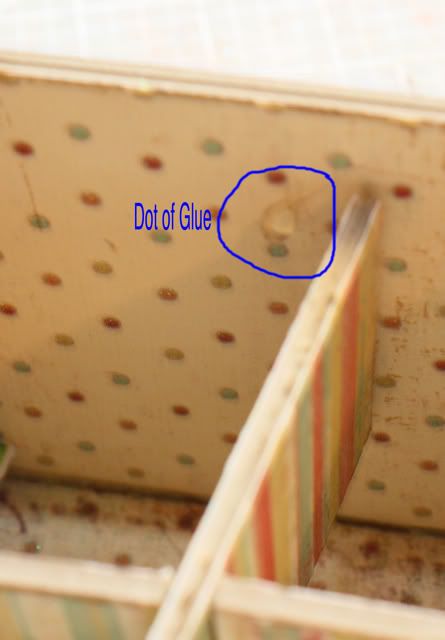 --- Step 11: The last side of the box is for a calendar. I found a calendar template online and downloaded it and then printed it at 75%. Cut it down to 2 1/2 x 3 and clip it on with a book binder clip. Add a book binder clip to the square for hanging photos as well. --- Step 12: add a few finishing touches like stickers and such and you’re done! 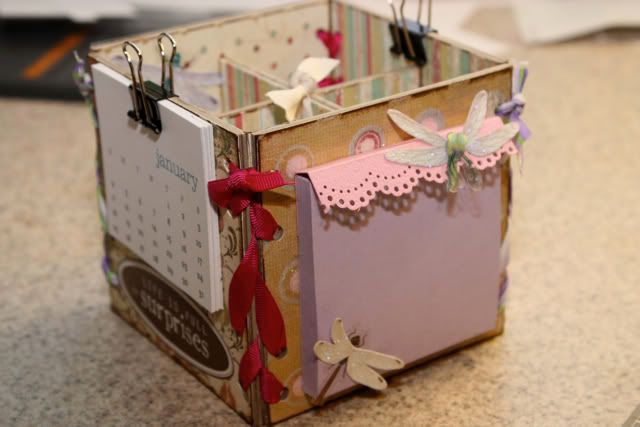 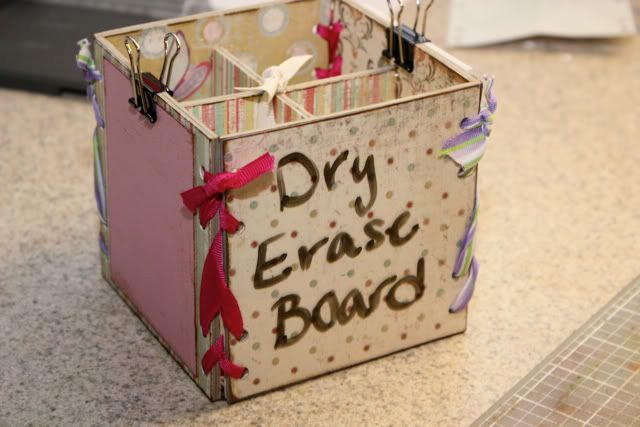 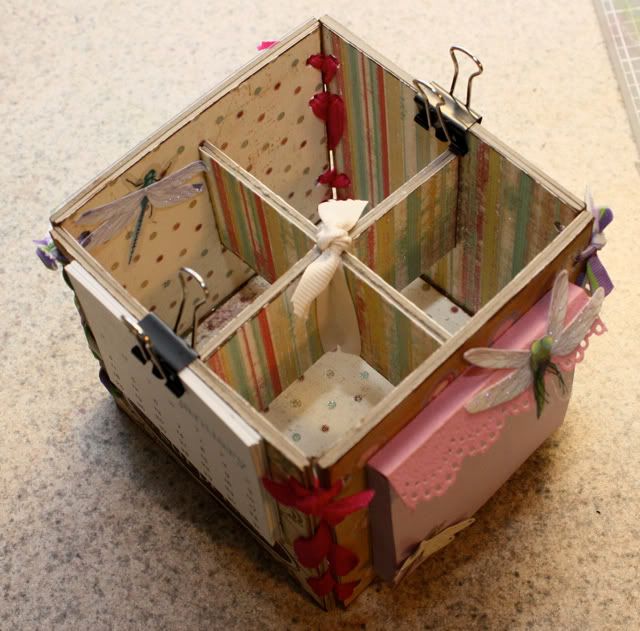

|


|
#2
09-15-2010, 02:43 PM
|
||||
|
||||
|
this is so cute! thanks for the great tutorial!
__________________

|


|
#4
09-15-2010, 02:48 PM
|
||||
|
||||
|
Sara, this is friggen CUTE!! Perfect for Christmas/holiday presents too!!
__________________
~Colleen~
Re-attempting a creative life after far too long!
|


|
#5
09-15-2010, 03:37 PM
|
||||
|
||||
|
woo hoo...thanks for the instructions!
__________________
 
|

|
#6
09-16-2010, 07:10 AM
|
||||
|
||||
|
Great project and great instructions too, thanks

__________________
  Save Save Save Save Save
|


|
#8
09-16-2010, 09:39 AM
|
||||
|
||||
|
How cute is this!!!!
__________________

|

|
#9
09-17-2010, 10:55 AM
|
|||
|
|||
|
This is really wonderful, thank you for taking the time to post such detailed instructions. I have a question regarding the "dry erase" side. I saw/read that you put plastic over the side, but did you adhere it to the side in any other way besides the whole punches with the ribbon? Thanks!
|
|
#10
09-17-2010, 11:11 AM
|
||||
|
||||
|
Do you think I could do this with the chipboard coasters I already have? They are 4x4 but have rounded corners...
|


|
#11
09-18-2010, 03:54 PM
|
||||
|
||||
|
i don't see why not.... might leave a bit of a gap at the top and bottom since it won't be flush due to the rounded corners but since it's not holding anything small that will fall out it should work!!
and for the plastic dry erase i only adhered it with the holes.. mainly since it's see through and i did not want a messy glue look.... 
|


|
#14
09-19-2010, 04:08 PM
|
||||
|
||||
|
Love this!!!!! Thanks for sharing!
|


 |
«
Previous Thread
|
Next Thread
»
 Linear Mode

|
|

All times are GMT -4. The time now is 02:30 AM.